Manual
Table of Contents
- Select an Ebook
- Read an Ebook
- Page orientation: Left to Right [→, Page layout: One Page
- Page orientation: Left to Right [→, Page layout: Two-page Spread
- Page orientation: Right to Left [←, Page layout: One Page
- Page orientation: Right to Left [←, Page layout: Two-page Spread
- Page orientation: Up to Down [↓, Page layout: One Page
- Page orientation: Up to Down [↓, Page layout: Two-page Spread
- Operation of Navigation Bar
- Manage an Ebook
- Import an Ebook
- Organize Ebooks
- Operation in 3D Perspective View
- Home View Function
- Page Thumbnails Function
- Browse the Web
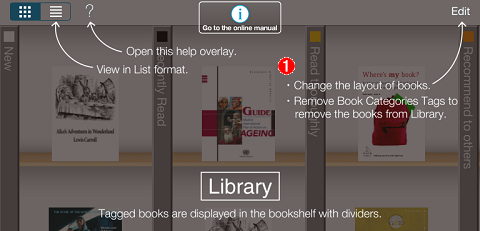
- Check the Help overlay
- Others
1. Select an Ebook
-
Storeroom : Book cover format

-
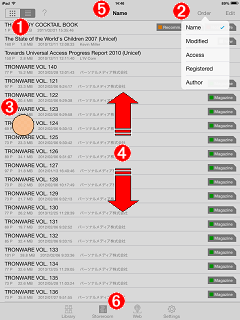
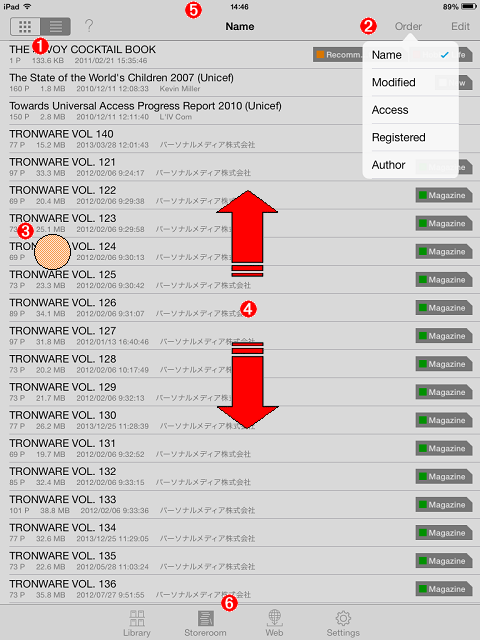
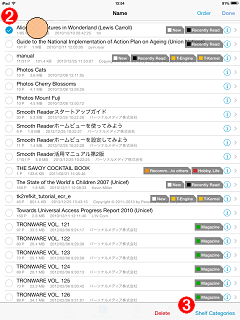
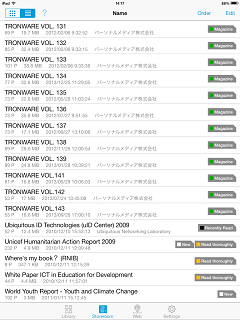
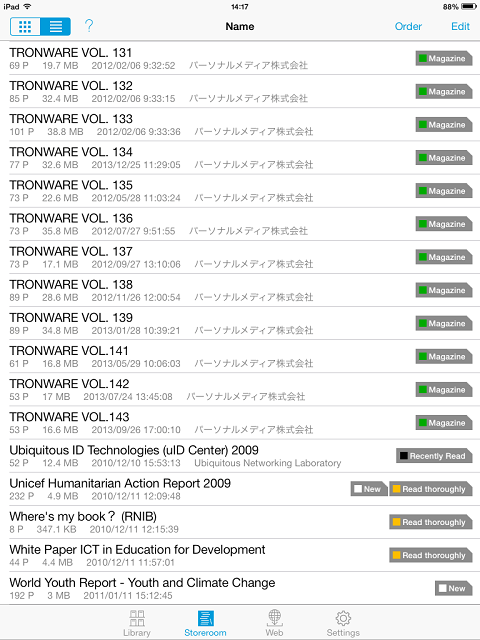
Storeroom : List format
-
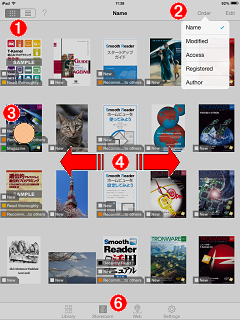
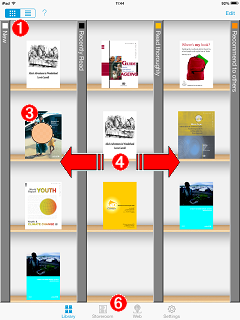
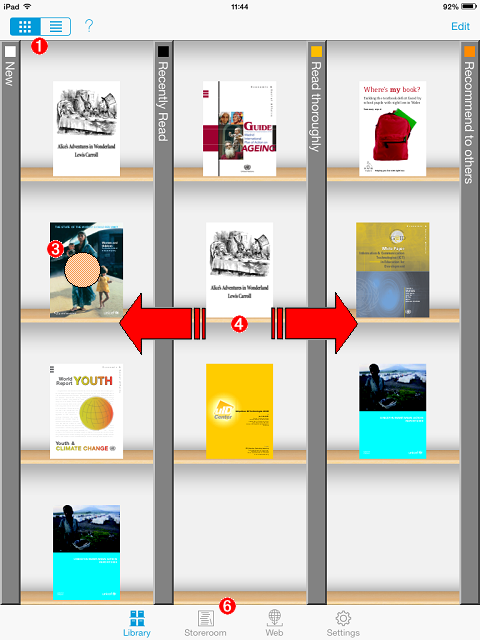
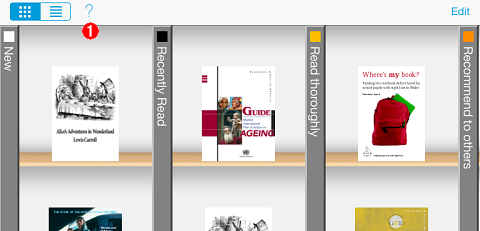
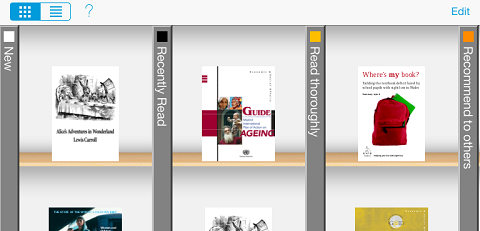
Library : Book cover format
-
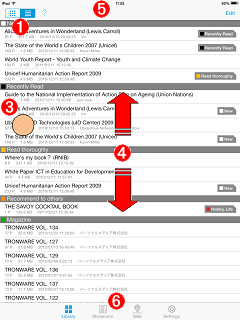
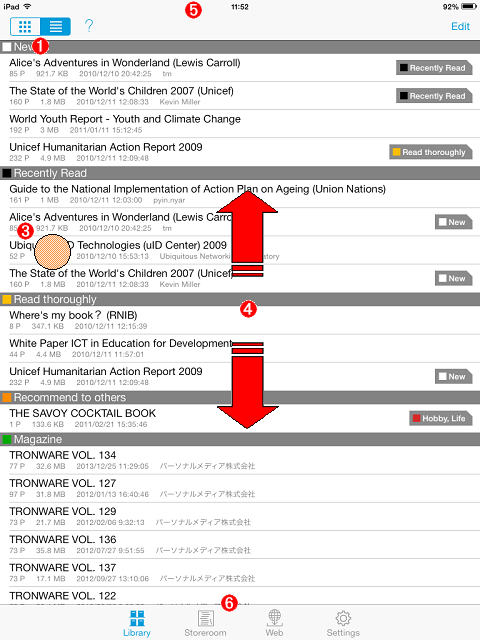
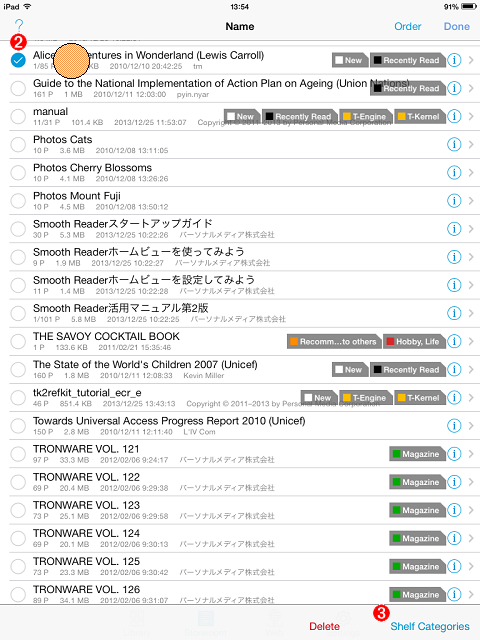
Library : List format
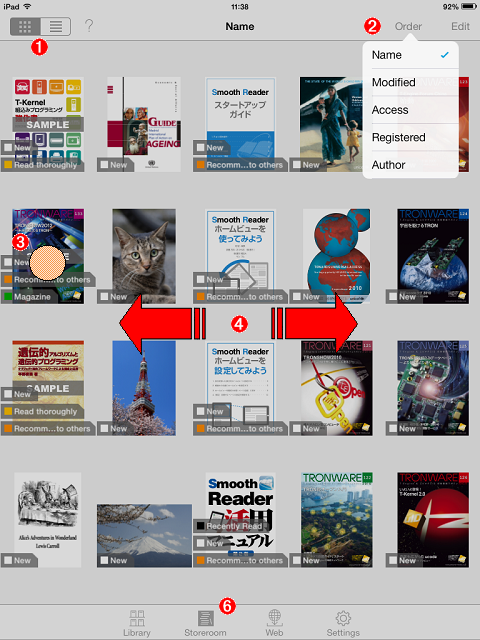
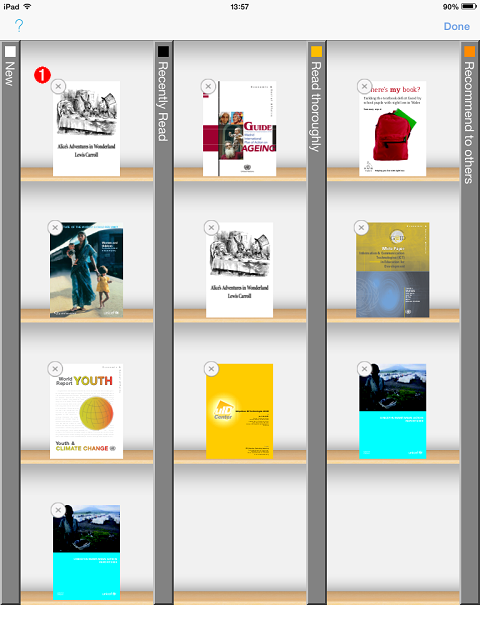
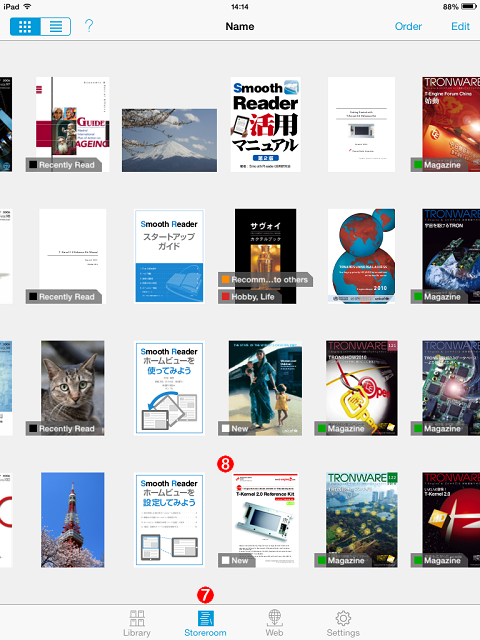
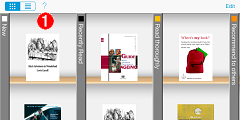
Smooth Reader provides two kinds of screens, "Storeroom" and "Library".
All registered ebooks are stored in the "Storeroom".
On the other hand, only ebooks attached with "Book categories tags" in the "Storeroom" are lined up in the "Library".
* To line up ebooks in Library, organize ebooks in Storeroom.
- Bookshelf style
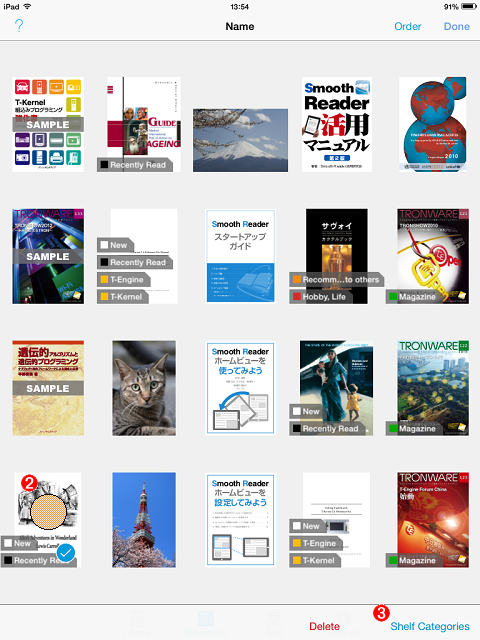
 Book cover(thumbnail) format
It displays a thumbnail image of the first page of each PDF file as a book cover.
Book categories tags are printed on each thumbnail. List format
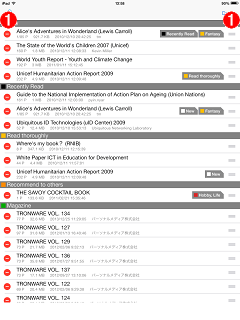
It displays File name, File size, Last modified date, Current page number/Total number of pages and Book categories tags.
It also displays Author name when the PDF property has Author settings.
The purchased ebook (PDF file) is attached with on the list.
The sample ebook (PDF file) downloaded at Smooth Reader Ebook Store is attached with on the list.
* Total number of pages and Author name are not displayed when an ebook is imported. Once you open an ebook, you can find these kind of information on the list.
- In the "Storeroom", you can sort ebooks by tapping
 in order of "file name", "last modified date", "last access date", "registered date", or "author name".
- In order of file name
Ebooks are displayed in alphabetical(character code) order. - In order of last modified date
Ebooks are displayed in descending order of last modified date. - In order of last access date(last reading date)
Ebooks are displayed in descending order of last access date(last reading date). - In order of registered date
Ebooks are displayed in descending order of registered date. - In order of author name
Ebooks are displayed in order of author name if the registered PDF has Author settings.
- In order of file name
* To sort ebooks in author name, open the ebook to show author name on the list.
* Ebooks without Author settings are displayed at the bottom of the list.
- To open an ebook, tap the cover image in Book cover format or the title in List format.
- Flick or swipe the screen for scrolling.
The scrolling direction for Book cover format is horizontal and the counterpart for List format is vertical.
* If you swipe the screen in Book cover format, the bookshelf is tilted and then the scrolling speed is accelerated.
For more information about this function, please refer to Operation in 3D Perspective View.
- Tap Status bar (the upper black-colored area of the screen) to go back to the head.
- Tap Tab bar to switch between "Storeroom" and "Library" screen.
 Library
Tagged ebooks are stored in the bookshelf with dividers. Storeroom
All ebooks are lined up.
2. Read an Ebook

 (Page orientation: Left to Right [→, Page layout: One Page)
-
Book-reading screen
- Tap the leftmost area, then you can go back to the previous page at once.
Touch and hold this edge, then you can go back to the previous pages consecutively. - Tap the upper left, then you can go back to the previous 1 view(*).
- Tap the lower left, then you can go back to the previous 1 view.
- Tap the rightmost area, then you can go forward to the next page at once.
Touch and hold this edge, then you can go forward to the next pages consecutively. - Tap the upper right, then you can go forward to the next 1 view.
- Tap the lower right, then you can go forward to the next 1 view.
- You can slide pages in the direction of your flick.
- Tap the middle area of the screen, then you can switch the tool bar into displayed or non-displayed.
If you double-tap this area when the panel for Home View Settings is displayed, you can go back to the previous view.
* The term "view" means "page" when the page layout is One Page and Home View is not active. To learn more about View's settings, read "Home View Function".
 (Page orientation: Left to Right [→, Page layout: Two-page Spread)
Smooth Reader automatically determines the page layout(One Page or Two-page Spread) and the page orientation(Right to Left or Left to Right), based on the imported PDF files' properties.
The operation in Two-page Spread is as follows.
* Please refer to FAQ regarding the criteria of Two-page Spread.
-
Two-page Spread
- Tap the leftmost area, then you can go back to the previous 2 pages.
Touch and hold this edge, then you can go back to the previous pages 2 by 2 consecutively. - Tap the upper left, then you can go back to the previous 1 view(*).
- Tap the lower left, then you can go back to the previous 1 view.
- Tap the rightmost area, then you can go forward to the next 2 pages.
Touch and hold this edge, then you can go forward to the next pages 2 by 2 consecutively. - Tap the upper right, then you can go forward to the next 1 view.
- Tap the lower right, then you can go forward to the next 1 view.
- You can slide pages in the direction of your flick.
- Tap the middle area of the screen, then you can switch the tool bar into displayed or non-displayed.
If you double-tap this area when the panel for Home View Settings is displayed, you can go back to the previous view.
* The term "view" means "Two-page Spread" when the page layout is Two-page Spread and Home View is not active. To learn more about View's settings, read "Home View Function".
 (Page orientation: Right to Left [←, Page layout: One Page)
-
Book-reading screen
- Tap the rightmost area, then you can go back to the previous page at once.
Touch and hold this edge, then you can go back to the previous pages consecutively. - Tap the upper right, then you can go back to the previous 1 view(*).
- Tap the lower right, then you can go back to the previous 1 view.
- Tap the leftmost area, then you can go forward to the next page at once.
Touch and hold this edge, then you can go forward to the next pages consecutively. - Tap the upper left, then you can go forward to the next 1 view.
- Tap the lower left, then you can go forward to the next 1 view.
- You can slide pages in the direction of your flick.
- Tap the middle area of the screen, then you can switch the tool bar into displayed or non-displayed.
If you double-tap this area when the panel for Home View Settings is displayed, you can go back to the previous view.
* The term "view" means "page" when the page layout is One Page and Home View is not active. To learn more about View's settings, read "Home View Function".
(Page orientation: Right to Left [←, Page layout: Two-page Spread)
Smooth Reader automatically determines the page layout(One Page or Two-page Spread) and the page orientation(Right to Left or Left to Right), based on the imported PDF files' properties.
The operation in Two-page Spread is as follows.
* Please refer to FAQ regarding the criteria of Two-page Spread.
-
Two-page Spread
- Tap the rightmost area, then you can go back to the previous 2 pages.
Touch and hold this edge, then you can go back to the previous pages 2 by 2 consecutively. - Tap the upper right, then you can go back to the previous 1 view(*).
- Tap the lower right, then you can go back to the previous 1 view.
- Tap the leftmost area, then you can go forward to the next 2 pages.
Touch and hold this edge, then you can go forward to the next pages 2 by 2 consecutively. - Tap the upper left, then you can go forward to the next 1 view.
- Tap the lower left, then you can go forward to the next 1 view.
- You can slide pages in the direction of your flick.
- Tap the middle area of the screen, then you can switch the tool bar into displayed or non-displayed.
If you double-tap this area when the panel for Home View Settings is displayed, you can go back to the previous view.
* The term "view" means "Two-page Spread" when the page layout is Two-page Spread and Home View is not active. To learn more about View's settings, read "Home View Function".
 (Page orientation: Up to Down [↓, Page layout: One Page)
-
Book-reading screen
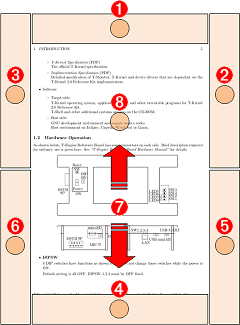
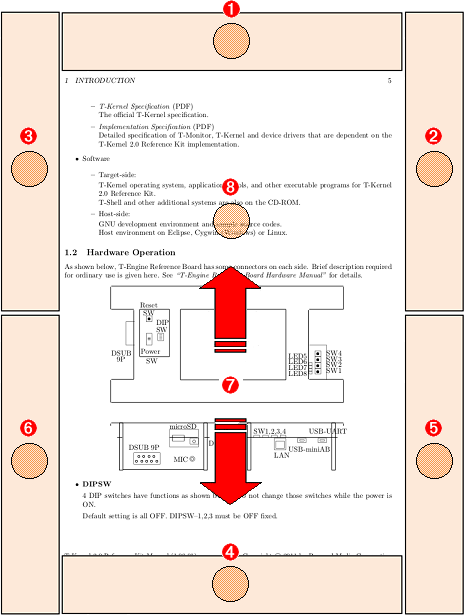
- Tap the top edge, then you can go back to the previous page at once.
Touch and hold this edge, then you can go back to the previous pages consecutively. - Tap the upper right, then you can go back to the previous 1 view(*).
- Tap the upper left, then you can go back to the previous 1 view.
- Tap the lower end, then you can go forward to the next page at once.
Touch and hold this edge, then you can go forward to the next pages consecutively. - Tap the lower right, then you can go forward to the next 1 view.
- Tap the lower left, then you can go forward to the next 1 view.
- You can slide pages in the direction of your flick.
- Tap the middle area of the screen, then you can switch the tool bar into displayed or non-displayed.
If you double-tap this area when the panel for Home View Settings is displayed, you can go back to the previous view.
* The term "view" means "page" when the page layout is One Page and Home View is not active. To learn more about View's settings, read "Home View Function".
(Page orientation: Up to Down [↓, Page layout: Two-page Spread)
Two pages are displayed vertically, when the page orientation is Up to Down and the page layout is Two-page Spread. Additionally, the operation in Two-page Spread is as follows.
-
Two-page Spread
- Tap the top edge, then you can go back to the previous 2 pages.
Touch and hold this edge, then you can go back to the previous pages 2 by 2 consecutively. - Tap the upper right, then you can go back to the previous 1 view(*).
- Tap the upper left, then you can go back to the previous 1 view.
- Tap the lower end, then you can go forward to the next 2 pages.
Touch and hold this edge, then you can go forward to the next pages 2 by 2 consecutively. - Tap the lower right, then you can go forward to the next 1 view.
- Tap the lower left, then you can go forward to the next 1 view.
- You can slide pages in the direction of your flick.
- Tap the middle area of the screen, then you can switch the tool bar into displayed or non-displayed.
If you double-tap this area when the panel for Home View Settings is displayed, you can go back to the previous view.
* The term "view" means "Two-page Spread" when the page layout is Two-page Spread and Home View is not active. To learn more about View's settings, read "Home View Function".
3. Operation of Navigation Bar
Show the Navigation Bar
-
Page layout: One Page
-
Page layout: Two-page Spread

 Bookshelf
Back to Book cover or List screen. Settings
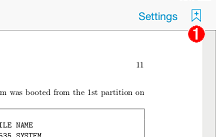
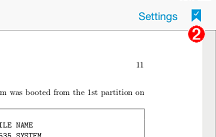
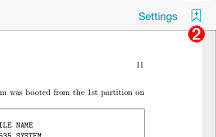
Display setting for ebook you are reading. Bookmark
Tap this button to add a bookmark to the current page.
 A bookmark is attached.
Tap the bookmark on the current page to delete the bookmark. Balloon
Tap this button to show the table of contents and the list of bookmarks.
You can add a comment to a bookmark. You can also delete a bookmark. Slider
- Drag the knob on the slider to jump pages.
- On the left side of the slider, Current page number and Total number of pages are displayed as a fraction.
- The red-colored line indicates the position of a bookmarked page.
- The gray-colored line indicates the position of page to which you can jump by tapping
 or
or  .
.
 Turn 1 page to Left
Tap this button to turn 1 page to the left. (This button appears only when the page layout is Two-page Spread.) Turn 1 page to Right
Tap this button to turn 1 page to the right. (This button appears only when the page layout is Two-page Spread.)- Back / Forward
Tap these buttons to go back and forth between the current page and the last page you have read before jumping (You can jump pages when you move pages by the slider, bookmarks or embedded links in a PDF).  Help
Help
Show help overlay.
Settings
-
Setting menu
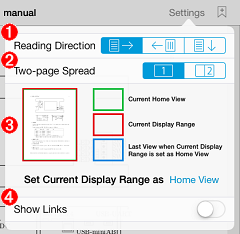
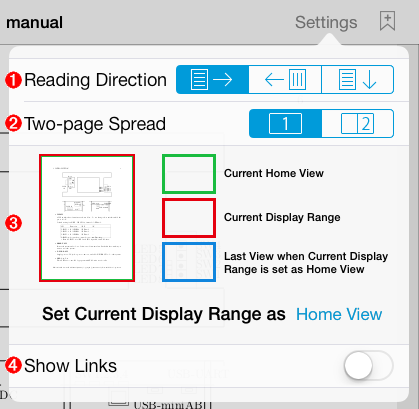
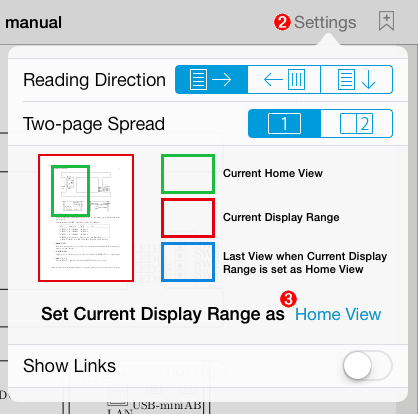
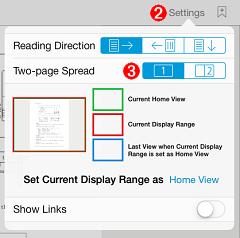
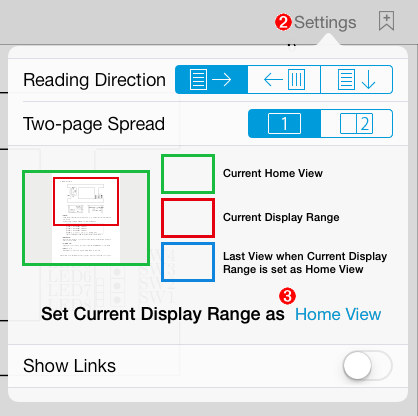
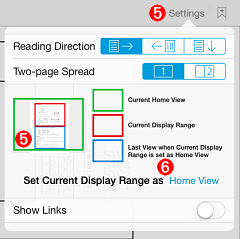
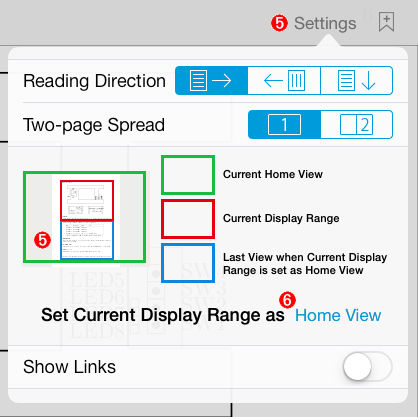
- Reading Direction
Set a direction to for horizontally written books. Set a direction to for vertically written books.
If you want to move pages up and down, tap . - Two-page Spread
One page or two-page spread are available, as a page layout for a horizontal direction of iPad. - Home View
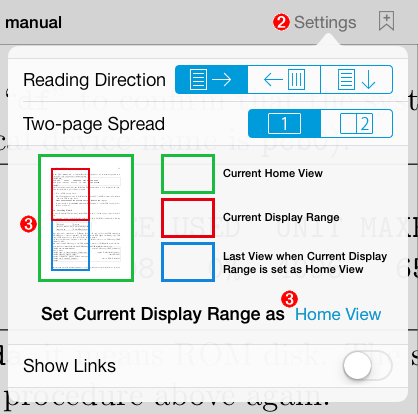
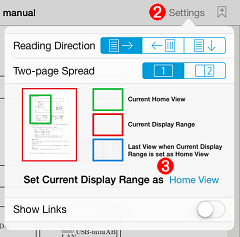
"Home View" is the first display range when the page is displayed. The default "Home View" is the whole one page, as long as you don't change the setting.
If you want to set a current display range as Home View, tap .
. - Show Links
If an ebook has embedded links in context, embedded links are displayed in pink color, as long as the link indication is . If the link indication is
  , embedded links are not displayed.
Make a new bookmark
-
Make a new bookmark
-
Add a new bookmark

- Tap .
- A bookmark is attached to the current page.
A bookmark is attached.
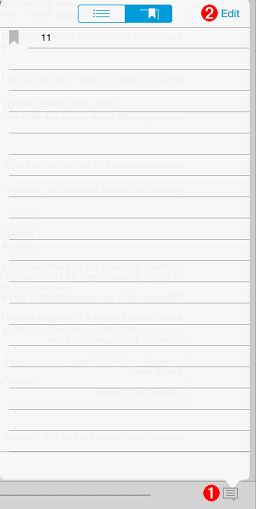
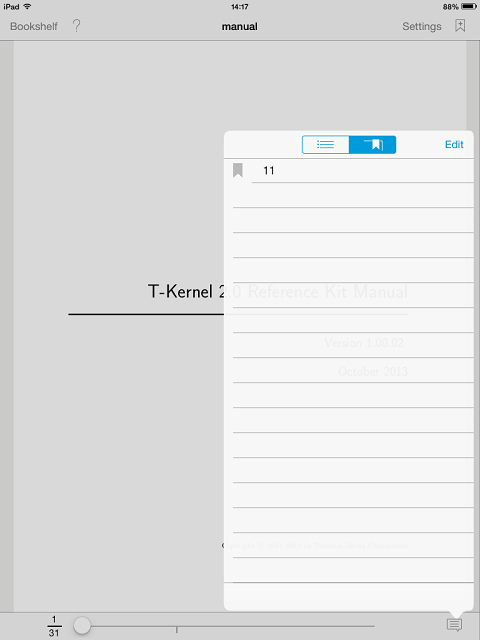
Show the list of bookmarks
-
List of bookmarks
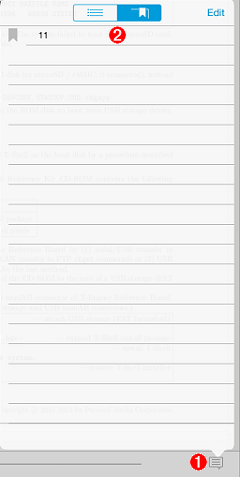

- Tap .
- The list of bookmarks is displayed. Tap any bookmark to jump to the corresponding page.
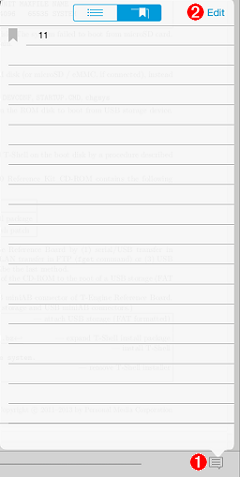
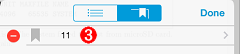
Add a comment to a bookmark
-
List of bookmarks
-
Select a bookmark
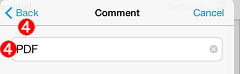
-
Input a comment
-
Add a comment


You can add a comment to a bookmark.
- Tap .
- Tap
 at the upper right corner.
 - Tap the bookmark you want to add a comment to.
- Input a comment by keyboard, and then tap
 .
. - Tap
 at the upper right corner.
Delete a bookmark(1)
-
Delete a bookmark

-
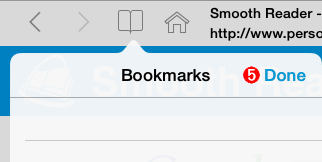
A bookmark is deleted

- Tap .
- The bookmark on the current page is deleted.
A bookmark is not attached.
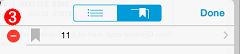
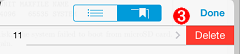
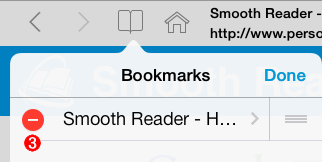
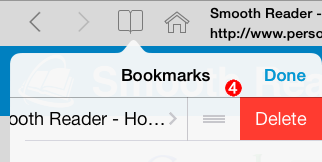
Delete a bookmark(2)
-
List of bookmarks
-
Select a bookmark you want to delete
-
Delete a bookmark
-
A bookmark is deleted


- Tap .
- Tap at the upper right corner of the menu.
- Tap
 showing up on the left side of the comment, and then tap
  .
. - Tap when a bookmark has been deleted.
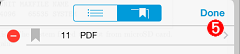
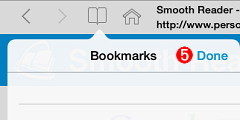
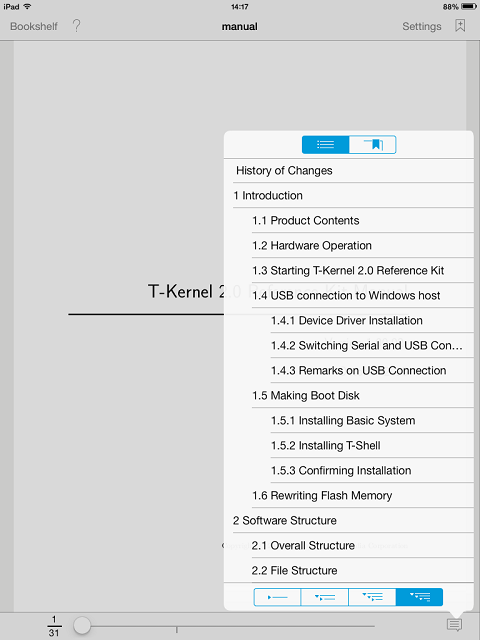
Show the table of contents
-
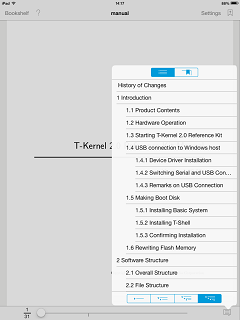
The table of contents is displayed.
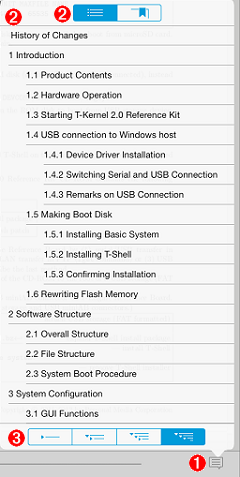
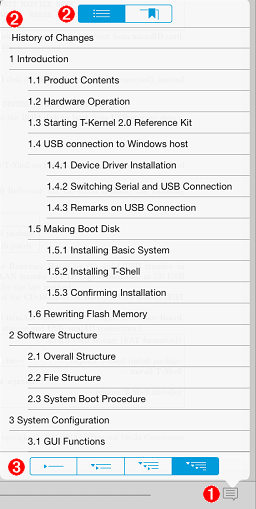
If the bookmarks(table of contents:TOC) are embedded in a PDF file in advance, Smooth Reader displays the list of bookmarks as the TOC.
※ The bookmark function of Smooth Reader and the bookmarks in a PDF file are different functions.
- Tap .
- If the bookmarks(TOC) are embedded in a PDF file, the TOC is displayed.
Tap any bookmark(TOC) to jump to the corresponding page.
 Shows the bookmarks (TOC) in a PDF file.
 Shows the bookmarks of Smooth Reader.
- You can select the TOC hierarchy from 1st, 2nd, 3rd or all.
As the default setting, "All hierarchies" is selected.
※ If each hierarchy has many items of TOC, the required time for switching view may increase.
 1st hierarchy
 2nd hierarchy
 3rd hierarchy
 All hierarchies (Default setting)
4. Manage an Ebook
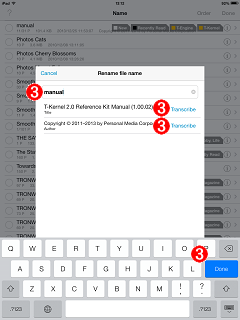
Rename an Ebook
-
Tap


-
Tap
 at the right side of the book title

-
Input the book title
-
Tap


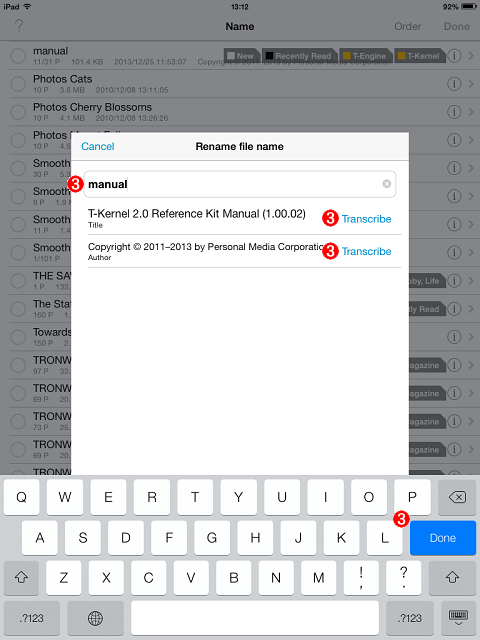

To rename a book title, the screen should be List format of Storeroom.
- In List format of Storeroom, tap at the upper right corner of the screen.
- Tap at the right side of the book title you want to rename.
- Input a book title by keyboard, and tap [Done] key button.
Tap to transcribe the ebook's title or author information to the name of an ebook.
 - Tap at the upper right corner of the screen.
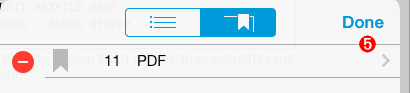
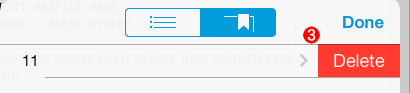
Delete an Ebook
-
Tap
-
Storeroom : Book cover format
-
Storeroom : List format
-
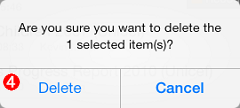
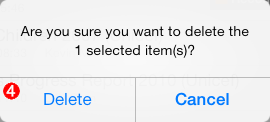
Confirmation panel for ebook-deletion
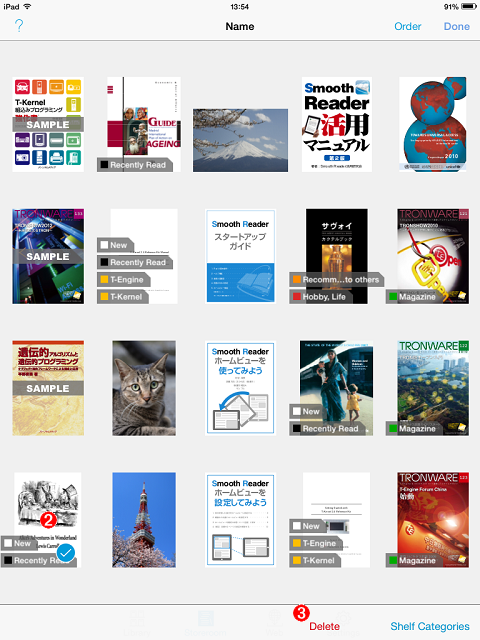
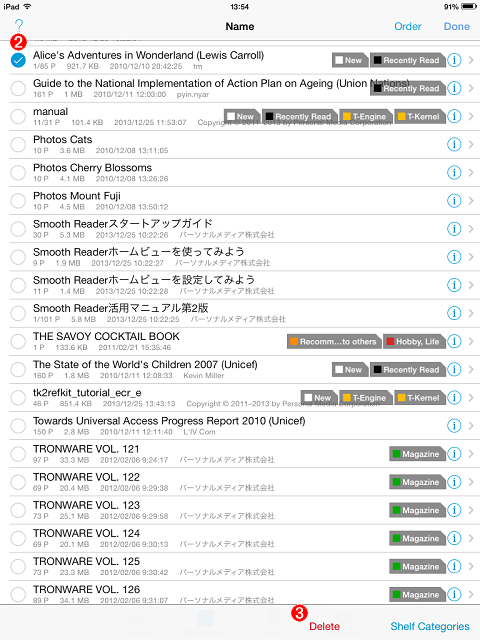
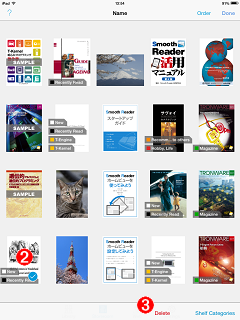
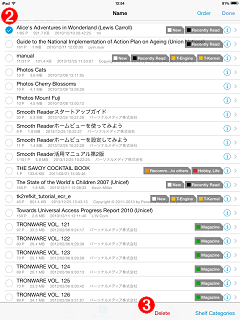
To delete an unwanted ebook, the screen should be Storeroom(List format or Book cover format).
- Tap at the upper right corner of Storeroom screen.
- Tap the book cover or the title of an ebook you want to delete, and then
 shows up.
 - Tap
 at the lower right corner of the screen.
* You can select multiple ebooks.
- After the confirmation panel for ebook-deletion is displayed, tap
 .
.
5. Import an Ebook
Import from iTunes
-
Screenshot of iTunes(1)
-
Screenshot of iTunes(2)


- Connect iPad to PC.
- Start up iTunes.
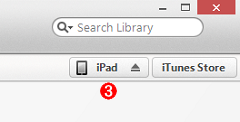
- Choose the connected iPad at "DEVECES" field.
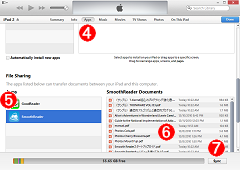
- Click [Apps] at the top of the screen.
- Choose "Smooth Reader" from "Apps" list of "File Sharing".
- Drag PDF files which you want to import into "Smooth Reader Documents" list.
- Synchronize iPad.
Import from Web Browser(Safari)
-
Screenshot of PDF opend by Safari
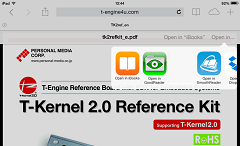
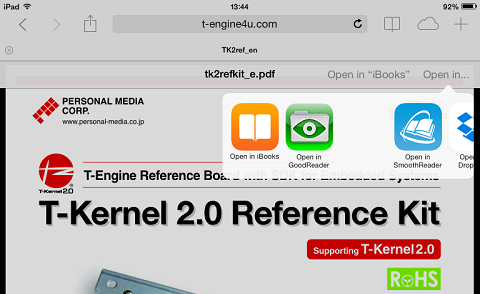
- Open the PDF file by tapping the link of PDF file on Browser.
- Tap
 and select "Open in SmoothReader" on the list.
 - Smooth Reader starts up and opens a PDF file.
Import from Mailer
-
Screenshot of PDF opend by Mailer
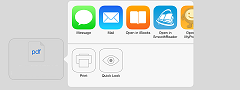
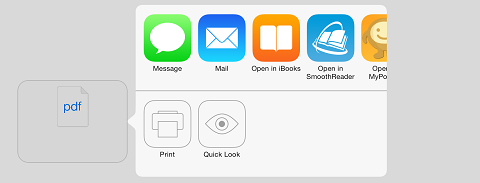
- Touch and hold the attached PDF file in the mail.
- Select "Open in SmoothReader" on the list.
- Smooth Reader starts up and opens the PDF file.
Import from Dropbox
-
Screenshot of PDF opened by Dropbox

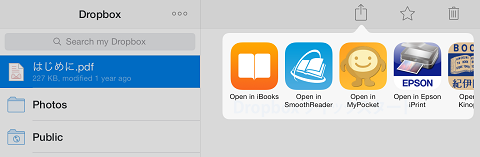
- Open the PDF file by Dropbox.
- After the PDF file is opened, tap
 at the upper right corner of the screen.
 - Tap "Open In...".
- Select "Open in SmoothReader" on the list.
- Smooth Reader starts up and opens the PDF file.
6. Organize Ebooks
Put "Book Categories Tags" on an ebook
-
Tap
-
Storeroom : Book cover format
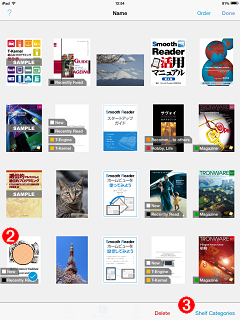
-
Storeroom : List format
-
Select "Book Categories Tags"
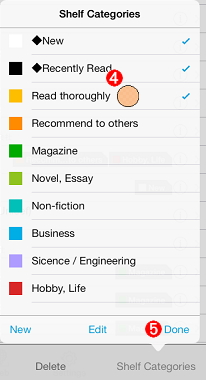
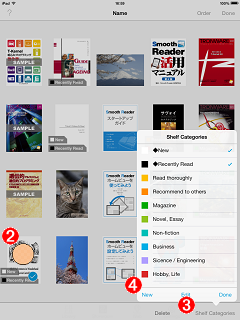
In Storeroom screen, you can put "Book Categories Tags" on your favorite ebooks and sort them by genre or categories.
The ebooks you newly registered or recently read are automatically attached with "♦New" tags or "♦Recently Read" tags(up to 8) respectively.
※ By entering the comma-delimited strings as the keywords of the PDF properties, "Book Categories Tags" of your entered strings automatically attach to an ebook when an ebook is registered in Storeroom.
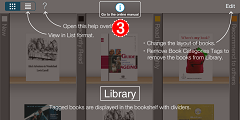
In Library, ebooks attached with "Book Categories Tags" in Storeroom are organized by sections of the bookshelf with dividers.
By putting or deleting the tags on ebooks, you can freely move ebooks into or out of Library.
- In Storeroom screen(List format or Book cover format), tap at the upper right corner of the screen.
- Tap the ebook you want to put tags on.
* You can select multiple ebooks.
- Tap
 at the lower right corner of the screen.
 - Tap the tag name you want from "Book Categories Tags" menu, and then
 shows up.
You can put multiple tags on one ebook.
To remove the tag, tap the tag name with . - Tap
 and then tags are displayed on the book cover or the list.
Create new "Book Categories Tags"
-
Tap
-
Create the new tag(Book cover format)
-
Input the tag name and specify the tag's color.

-
The new tag has been added

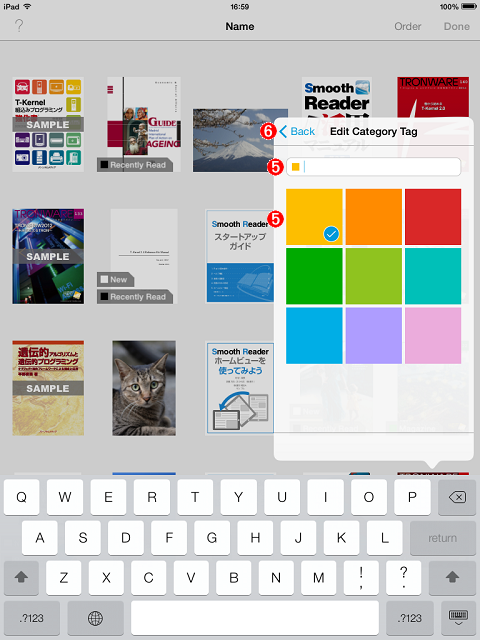
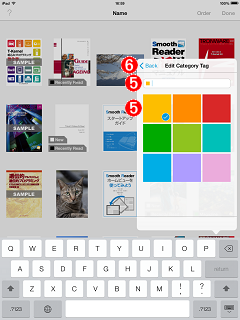
You can create new tags you want in addition to pre-registered "Book Categories Tags".
- In Storeroom screen(List format or Book cover format), tap at the upper right corner of the screen.
- Tap the ebook you want to put a new tag on.
* You can select multiple ebooks.
* You can create a new tag even when no books are selected.
- Tap at the lower right corner of the screen.
- Tap
 .
. - Input the tag name, and then tap .
* You can not create a tag that starts with the character "♦".
You can also specify the tag's color. - Tap
 at the upper left corner of the panel.
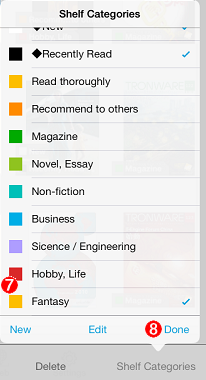
 - The new tag is added.
- Tap .
* A tag creation will be canceled unless you tap .
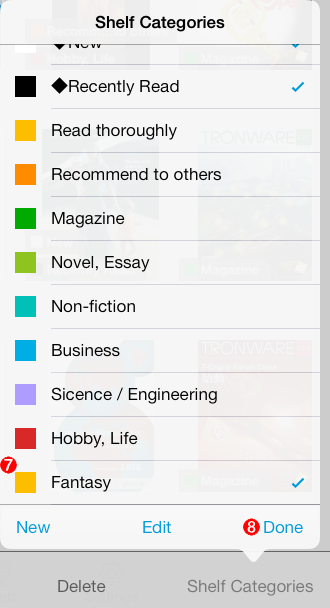
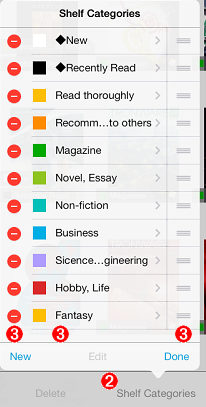
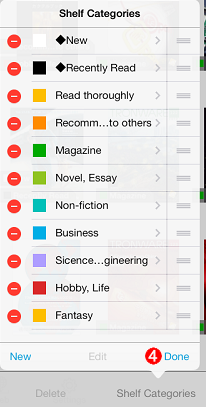
Edit "Book Categories Tags"
-
Tap
-
Tag editing screen
-
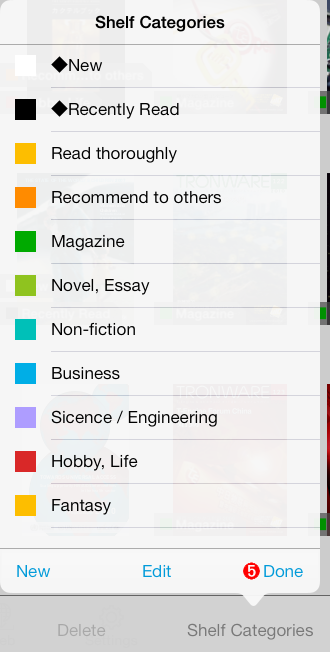
The completion of tag edit
-
The completion of tag operation

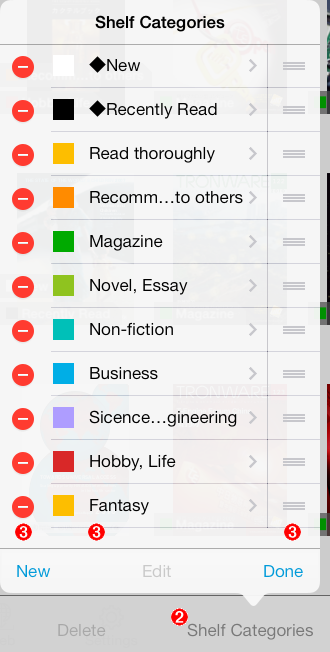
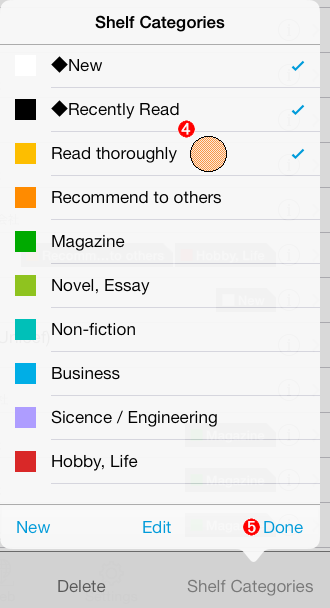
You can delete/rename the registered "Book Categories Tags".
Also you can sort the tags' order, and the sorted order reflects the dividers' layout in the "Library".
- In Storeroom screen(List format or Book cover format), tap at the upper right corner of the screen.
- Tap at the lower right corner of the screen.
- Edit "Book Categories Tags".
- To delete a tag, tap .
- To sort tags, drag
 .
. - To rename a tag, tap the tag name and input a new name.
You can also specify the tag's color.
- To delete a tag, tap
* You can rename "♦New" tag and "♦Recently Read" tag if you want.
* If you register a new ebook after you rename "♦New" tag, "♦New" tag is automatically created and the registered ebook is attached with this tag.
* If you open an ebook after you rename "♦Recently Read" tag, "♦Recently Read" tag is automatically created and the opened ebook is attached with this tag.
* You can not change the current tag name into a new name starts with the character "♦".
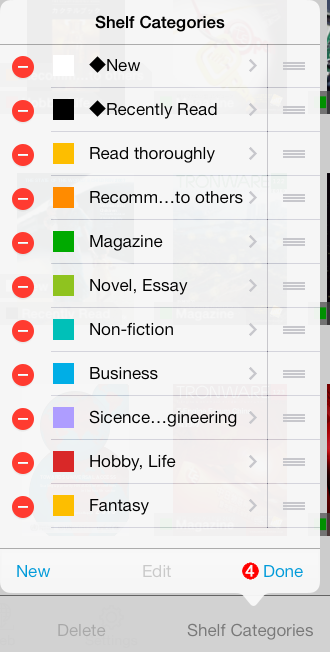
- After your editing has done, tap .
- Make sure the tags has been edited, and then tap once again.
* A tag editing will be canceled unless you tap .
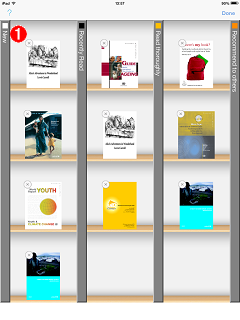
Operate Shelf Categories in Library(Book cover format)
-
Tap

-
Library : Book cover format
-
The completion of shelf sort operation


You can move ebooks lined up on the section with dividers in Library to the other section.
Also, you can remove ebooks from Library. An ebook itself can not be deleted.
* Removing an ebook from Library has the same meaning of removing the tag from an ebook.
* If an ebook is moved to the other section in Library, the previous tag is removed from an ebook, and then the new tag that is the same name as the divider's name is put on an ebook.
* You can sort ebooks in the same section of the bookshelf.
- Tap at the upper right corner of the screen.
- To move an ebook to the other section of the bookshelf, drag the book cover.
- To remove an ebook form the bookshelf, tap
 at the upper left corner of an ebook.
- After the moving or deletion operation has done, tap .
Operate Shelf Categories in Library(List format)
-
Tap

-
Library : List format
-
The completion of shelf sort operation


- Tap at the upper right corner of the screen.
- To move an ebook to the other section of the bookshelf, drag on the
rightmost area of the title.
- To remove an ebook form the bookshelf, tap on the left corner of the title, and then tap showing up on the right side of the screen.
- To move an ebook to the other section of the bookshelf, drag
- After the moving or deletion operation has done, tap .
7. Operation in 3D Perspective View
Operation in 3D Perspective View
-
3D Perspective View

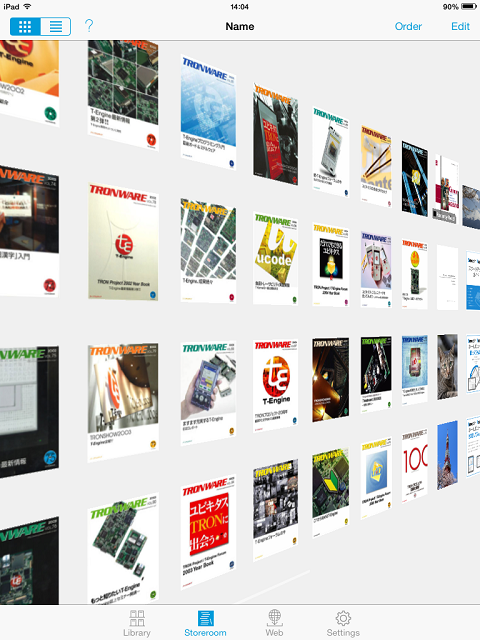
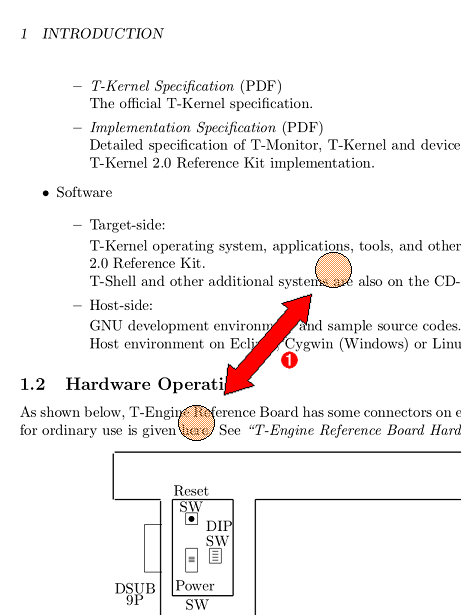
When you swipe and hold your finger on the screen for a second in Book cover format(Storeroom or Library), the bookshelf is tilted and then the scrolling action starts(3D Perspective View).
Once 3D Perspective View starts, the bookshelf moves automatically depending on your finger position. Thus, you can find desired ebooks easily without a repeat of flicking.
Depending on your stopped finger position after a swipe, the scrolling direction changes.
- Your finger position after a swipe is on the right half area of the screen, the bookshelf is tilted to the left rear and the scrolling starts for viewing the shelf's left side.
- Your finger position after a swipe is on the left half area of the screen, the bookshelf is tilted to the right rear and the scrolling starts for viewing the shelf's right side.
- To slow down the speed of 3D Perspective View, move your stopped finger to the middle of the screen.
- To finish 3D Perspective View, lift your finger off the screen.
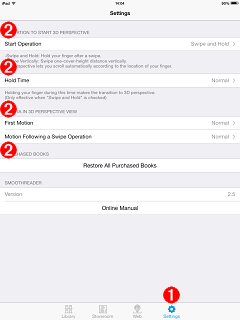
Settings for 3D Perspective View
-
Screen for 3D Perspective View settings
-
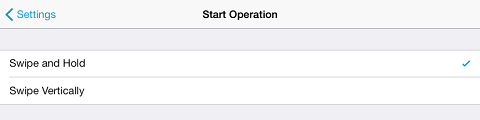
Setting for Start Operation
-
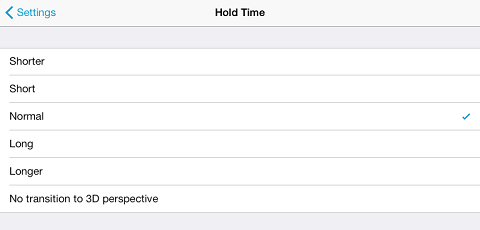
Setting for Hold Time
-
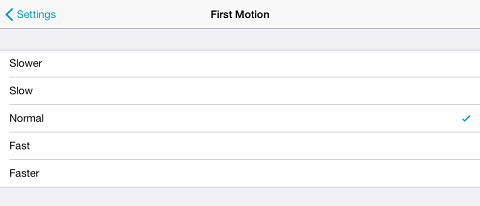
Setting for First Motion
-
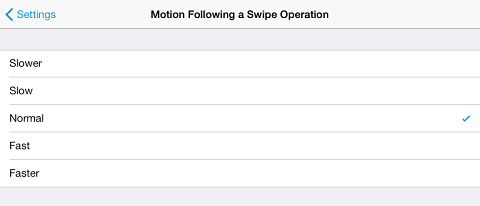
Setting for Motion Following a Swipe Operation
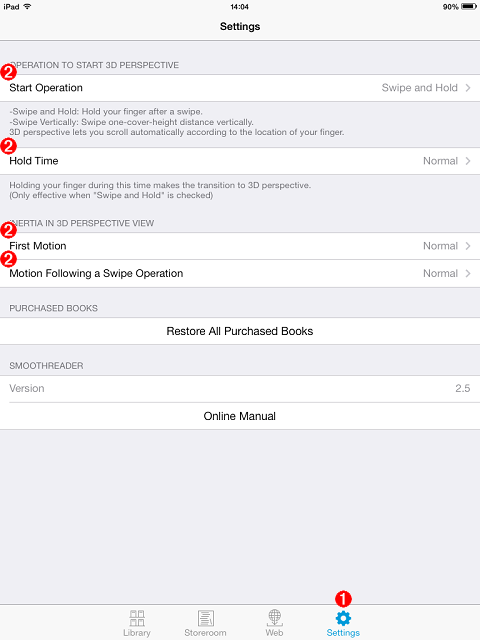
By "Settings" of Smooth Reader, you can change settings for 3D Perspective View including the start operation and the scrolling speed.
- Tap
 in a tab bar.
 - Settings screen of Smooth Reader is displayed.
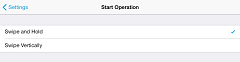
- Start Operation
You can select the start operation for switching the scroll mode from 2D(normal) to 3D(3D Perspective View) in Book cover format.
"Swipe and Hold" : 3D Perspective View starts by holding your finger during a swipe.
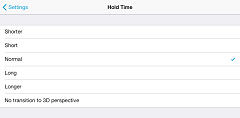
"Swipe Vertically" : 3D Perspective View starts when you swipe the length of one book cover vertically. By swiping vertically or diagonally in 2D scrolling, you can move into 3D Perspective View. - Hold Time
If you select "Swipe and Hold" in Start Operation, you can select the hold time for starting 3D Perspective View from holding your finger in 5 levels.
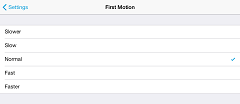
If you don't want 3D Perspective View, select "No transition to 3D perspective". - First Motion
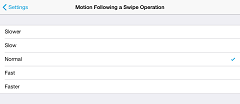
You can select the speed of acceleration in 5 levels for the first motion of 3D Perspective View. - Motion Following a Swipe Operation
You can select the reaction rate of scrolling in 5 levels for moving your finger right and left during 3D Perspective View.
- Start Operation
8. Home View Function
Home View Function enables you to read the magnified main text without margins of a page(including page number or chapter title) and footnotes. Additionally, you can read pages at twice the size if you hold your iPad landscape and display the upper half and the lower half of a page in order.
Setting Home View
-
Magnification of the screen
-
Setting Home View

-
Home View setting is done
- In the book-readig screen, pinch the range you want to set as Home View for zoom and drag it.
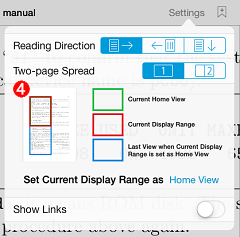
- Tap of Navigation Bar.
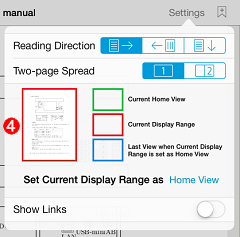
- In the preview screen, you can check Current Home View and Current Display Range.
The 2nd View(Last View) range is also displayed, when Current Display Range is set as Home View and there is equal-sized space under Home View.
- Green frame: Current Home View
- Red frame: Current Display Range
- Gray frame: Next Home View (When 3 or more Home View can be set in one page)
- Blue frame: Last View
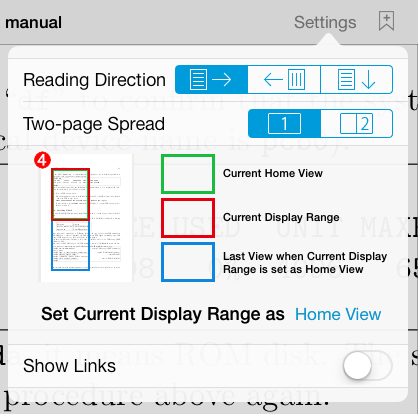
. - In the preview screen, the green frame for Current Home View and the red frame for Current Display Range get together.
Operation when Home View is active
-
Home View is active

In the book-reading screen, the contents are displayed in Home View range.
If you turn pages, this Home View setting is not changed.
As long as Home View is active, the following operations are available, in addition to the operations in Read an Ebook.
- To read the outside of Home View range, drag the screen.
- When you read the outside of Home View range, double-tap the screen to go back to Home View range.
Release Home View setting
-
Release of Home View setting
-
Home View is released.

- Pinch in the screen to show the whole page.
- Tap of Navigation Bar.
- Tap .
- In the preview screen, the green frame for Current Home View and the red frame for Current Display Range get together.
- In the book-reading screen, Home View setting is released and the whole 1 page is displayed on the screen.
Home View: Usage Example 1 (Moving through a book with flick operation)
You can move through the magnified pages only with flick operation, if you hold your iPad landscape and set the uppermost part of a vertically long page as Home View.
-
Setting for "One Page" layout (displaying pages 1 by 1)
-
Setting display range
(The result of step )
)

-
Setting Home View

-
Flick up
-
The last half of the page
(The result of step )
)

-
Flick left
-
Next page's Home View
(The result of step )
)


- Hold your iPad landscape.
- Tap of Navigation Bar.
- To set "One Page" as the page layout, tap .
- To show the first line of the page at the screen's uppermost area, pinch the area for zoom and drag it in the book-reading screen.
- Tap of Navigation Bar.
- To set Current Display Range as Home View, tap .
- Flick up.
- The last half of the page is displayed.
- Flick left.
- The next page's Home View is displayed.
In this way, if you set Home View for the area you want to zoom, you can keep reading the area in full screen. You can turn and move pages only with flick operation.
Home View: Usage Example 2 (Moving through a book with tap operation)
In the example 1, you have to flick up for moving in the same page and flick left for turning pages.
If there is equal-sized space under Home View, this space is set as the 2nd view. In this case, you can move views and read page after page only with tap operation.
-
Setting for "One Page" layout (displaying pages 1 by 1)
-
Setting display range
(The result of step)
-
Setting Home View
-
Tap the lower right
-
The 2nd view
(The result of step)

-
Tap the lower right

-
Next page's Home View
(The result of step )
)


- Hold your iPad landscape.
- Tap of Navigation Bar.
- To set "One Page" as the page layout, tap .
- To show the first line of the page across the width at the screen's uppermost area, pinch the area for zoom and drag it in the book-reading screen.
- Tap of Navigation Bar.
In the preview screen, check that Last View is displaying as Home View settings. - To set Current Display Range as Home View, tap .
- When Home View is displayed, tap the lower right of the screen to move into the 2nd view (the lower half part of 1 page in Last View).
- Tap the lower right of the screen when you are in the 2nd view, you can move into the next page's Home View.
In this way, if you set Home View for the area you want to zoom, you can keep reading the area in full screen. You can turn and move pages only with tap operation.
9. Page Thumbnails Function
Showing Page Thumbnails
-
Showing Page Thumbnails
By Page Thumbnails Function, you can preview the pages of a PDF file with thumbnails. With this function, you can tap the thumbnail to read the page directly. You can also preview only the pages with bookmarks.
- In the book-reading screen, pinch in the screen.
- Page thumbnails appear on the screen.
Operation of Page Thumbnails
-
Showing Page Thumbnails
 Back
Back
Go back to the previous screen. You can also pinch out to go back to the previous screen. Bookmark
Tap to preview only the pages with bookmarks.
By tapping the icon, changes into  (ON).
(ON).
- Shows all pages.
- Shows only pages with bookmarks.
 Slider
Drag the knob on the slider to scroll thumbnails. You can also flick the screen up-and-down to scroll the thumbnails.
The green-colored line indicates the position of last page you have read.
The blue-colored line indicates the position of bookmarked page. Page with Bookmark
If the page has a bookmark, the bookmark icon is attached to the upper right corner of the thumbnail.- The last page you have read is surrounded by a green-colored frame.
- Tap any thumbnail to jump to the corresponding page.
- The page number is displayed below the thumbnail.
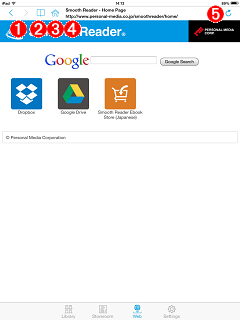
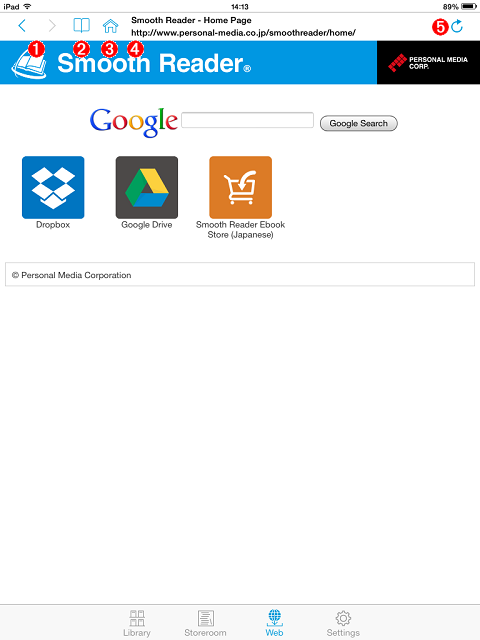
10. Browse the Web
Browse the Websites
-
A website is displayed.
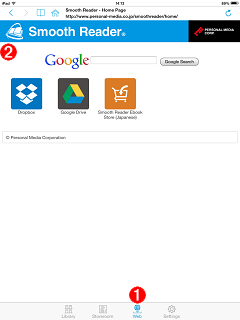
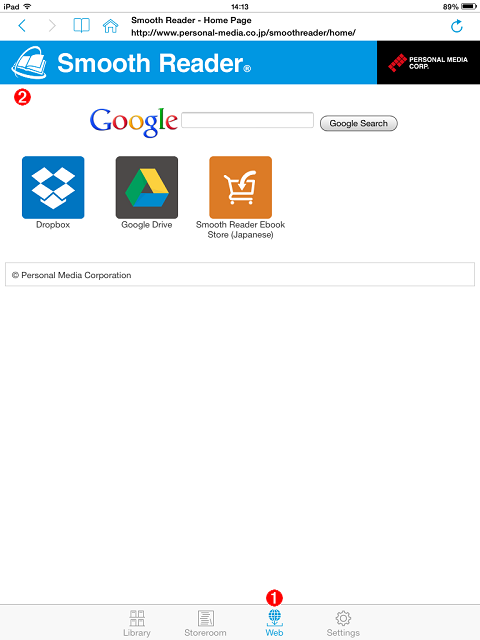
By the built-in web browser in Smooth Reader, you can browse the web directly from Smooth Reader without starting the other web browser.
- Tap
 in a tab bar.
 - The built-in web browser in Smooth Reader starts and the website is displayed.
※ If you tap
in the next use, the last web page you have read is comming back.
Operation of Navigation Bar
-
Operation of Navigation Bar
- Back / Forward
 Go back to the previous page.
 Go forward to the next page.
 Bookmark
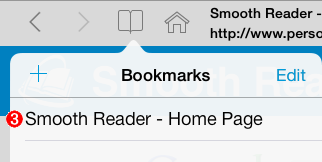
Add/Delete bookmark. Home
Home
Go to "Smooth Reader Home Page".- Show the title and URL of the web page.
 Reload
Reload the web page you are reading.
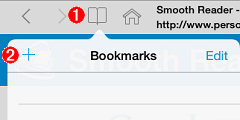
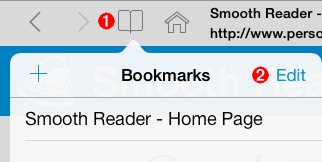
Add a Bookmark
-
Add a bookmark.
-
The new bookmark is added.
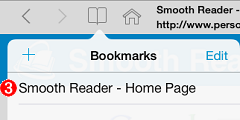
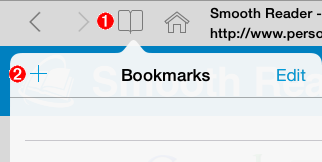
- Tap to show the menu for adding a bookmark.
- Tap
 at the upper left of the menu.
 - A bookmark is newly added.
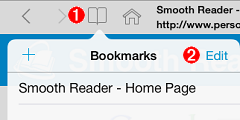
Edit a Bookmark
-
Edit a bookmark
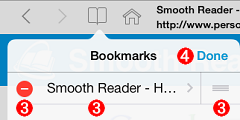
-
Edit screen of Bookmarks
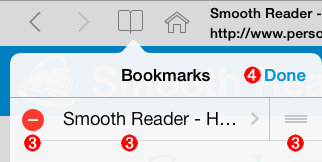
- Tap .
- Tap at the upper right of the screen.
- Edit a bookmark.
- Tap to delete a bookmark.
- Drag to sort bookmarks.
- Tap a bookmark name to change the bookmark name and URL by keyboard.
- Tap
- After your editing has done, tap .
Delete a Bookmark
-
Bookmarks
-
Edit a bookmark
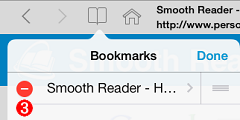
-
Delete a bookmark
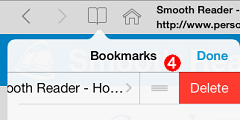
-
Completion of deletion of a bookmark
- Tap .
- Tap at the upper right of the bookmarks.
- Tap
 showing up on the left side of the comment.
 - Tap .
- Tap after a bookmark has been deleted.
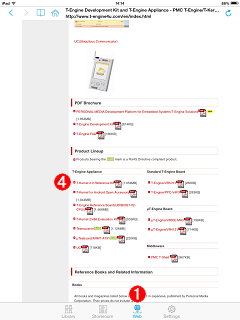
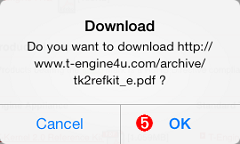
Download a PDF file
-
Select a PDF file.
-
Download confirmation
-
Screen when the download is processing

-
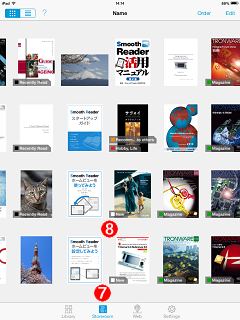
Downloaded PDF file


By the built-in web browser in Smooth Reader, you can download PDF files on the websites directly to Storeroom of Smooth Reader.
- Tap in a tab bar.
- The built-in web browser in Smooth Reader starts and the website is displayed.
- Access the website where you want to download PDF files.
- Tap the link of the PDF file.
- The download confirmation panel for the selected PDF file appears, then tap
 .
. - The PDF file is downloaded to Storeroom of Smooth Reader.
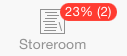
You can check the download status of PDF file in percent figures on Storeroom button.
If multiple PDF files have been downloaded, the number in parentheses means remaining files.
- Tap .
- The downloaded PDF file is displayed.
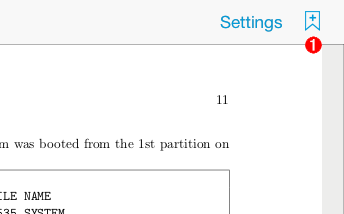
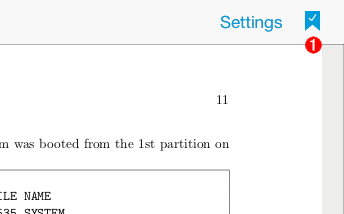
11. Check the Help overlay
Show the Help overlay
-
Help overlay is available.
-
Online manual is available.
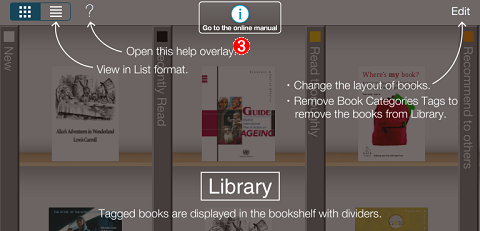
- Tap
 at the upper right corner of the screen.
 - The help overlay is displayed translucently.
- To read the online manual(this page) in Smooth Reader Website, tap
 .
.
Hide the Help overlay
-
Help overlay is displayed.
-
Help overlay is closed.
- Tap anywhere you like on the help overlay.
- The help overlay is closed.
12. Others
Settings
-
Settings screen
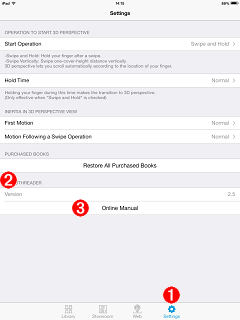
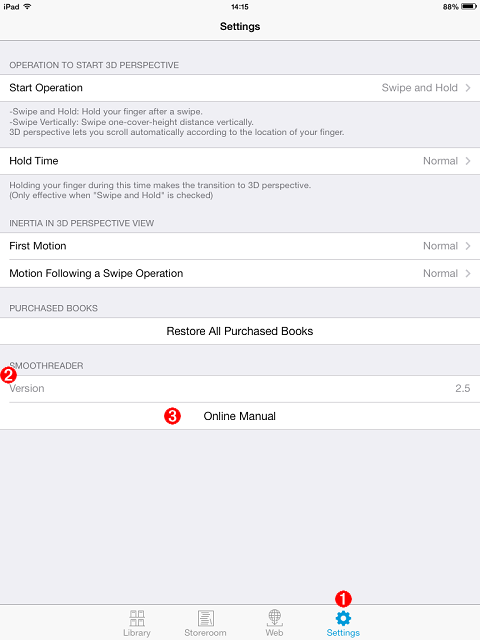
On "Settings" screen of Smooth Reader, you can find the version number of Smooth Reader. You can also visit Smooth Reader Website from "Settings" screen.
- Tap in a tab bar.
- Version
You can find the version number of Smooth Reader you are using. - Online Manual
Tap [Online Manual] to show Online Manual on Smooth Reader Website.
Change font size
-
Storeroom : List format
-
Library : List format

-
List of bookmarks

-
Table of contents

By Dynamic Type(the new function of iOS 7), you can change font size of Smooth Reader's List format in "Storeroom" and "Library", bookmarks and the table of contents.
To change font size, use "Settings" app of iPad.
- Tap the Settings app icon
 of iPad.
 - Tap "General" on the left side of the screen.
- Tap "Text Size" on the right side.
- Drag the slider on the lower side to change font size.


- 日本語
- English